Azure Single Sign On
Follow these steps to configure the Symbol Security SSO on your Azure application:
Step 1: Add Symbol Security SSO to your Azure applications
-
Open a new tab and sign in to the Azure portal using your Microsoft work account.
- On the left navigation pane, select the Azure Active Directory service.
- Navigate to Enterprise Applications and then click New application in the top
- Select Non-gallery application
- Enter Symbol Security SSO as name and click Add.
Step 2: Configure Azure SSO with Symbol Security SSO
-
In the Azure Portal, on the Symbol Security SSO application integration, find the Manage section and select single sign-on.
- On the Select a single sign-on method page, select SAML.
- Click the edit/pen icon for Basic SAML Configuration to edit the settings.
- Copy/paste values from the Settings Page in Symbol Security App (Step 1.5)
- Click Save in the top and choose to validate later.
- Navigate to SAML Signing certificate, click Federation Metadata XML Download.
- Upload the .xml file on the Service Provider Metadata field from Symbol Security app.
- Click on the Activate SSO button on Symbol Security Application in order to finish the configuration process.
When you enable or disable the configuration it will be kept on our system.
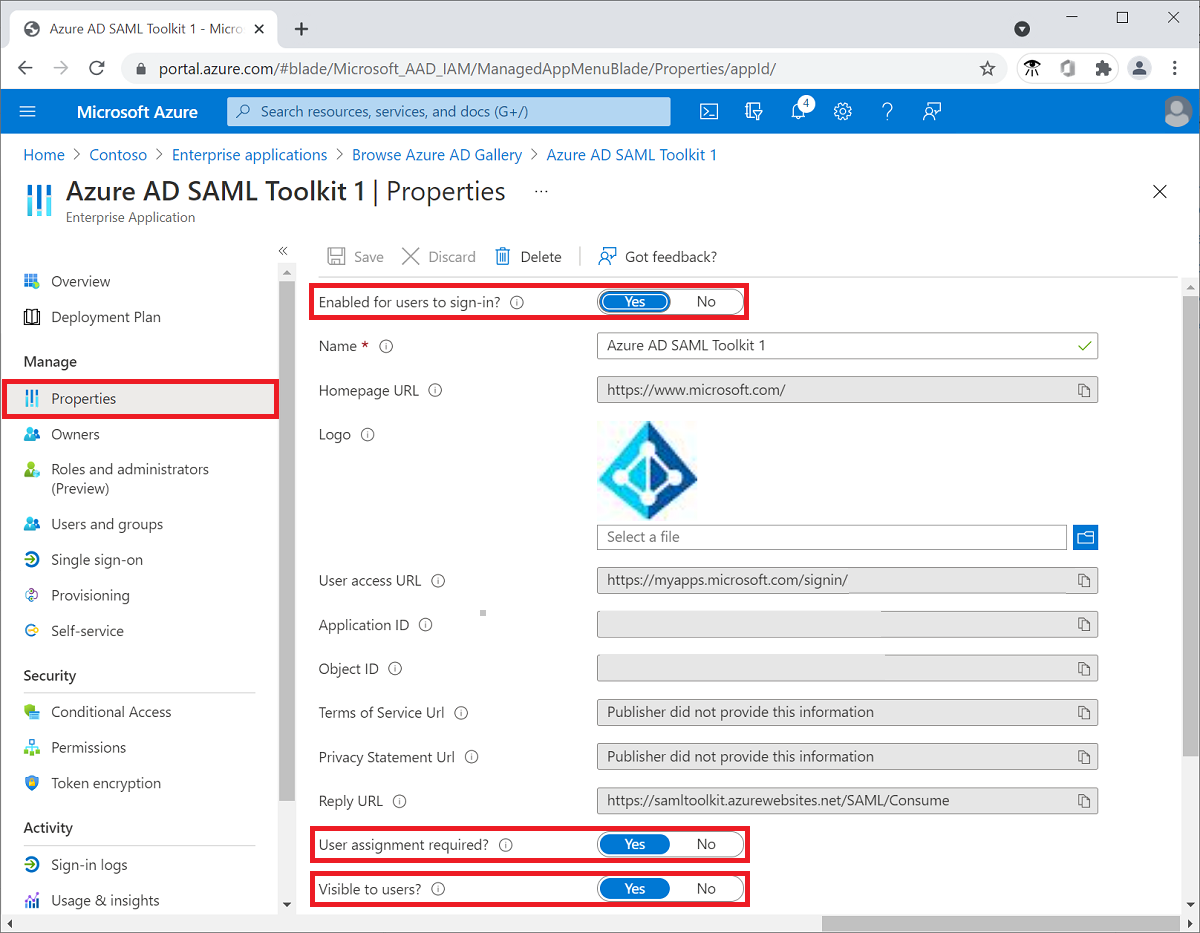
Step 3: Configure the Symbol SSO properties within Azure
- Determine if Symbol SSO application is enabled and assigned for all User Accounts
- Detailed Instructions are here
- By Enabling Users for Sign In (Enabled for users to sign in?), and managing the User assignment required fields, you can determine access properties of the Symbol Application via SSO
- This is located under Enterprise Application->Properties
Step 4: Alternative means to control Users SSO Access to Symbol Application
- In the Azure Active Directory Admin Center, select Enterprise applications, and then search for and select the application to which you want to assign the user account.
- In the left pane, select Users and groups, and then select Add user/group.
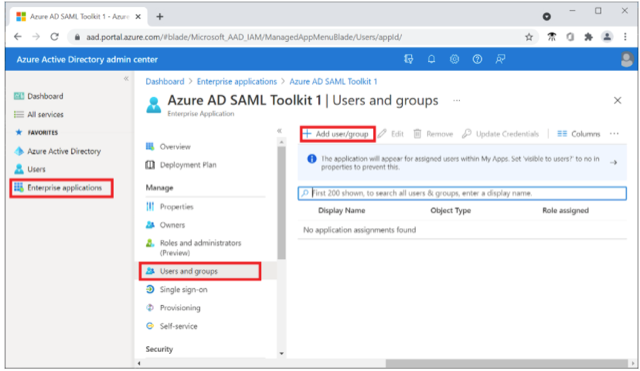
- On the Add Assignment pane, select None Selected under Users and groups.
- Search for and select the user that you want to assign to the application. For example, Symbol Security
- Select Select.
- On the Add Assignment pane, select Assign at the bottom of the pane.
Step 5: Assign the Azure AD test user
- If you haven't already assigned your Users and Groups to the Symbol SSO access, you can first assign a test user
- After finishing the configuration process, return to the Azure Portal and under the Manage section select Users and groups.
- Select Add user, then select Users and groups in the Add Assignment dialog.
- In the Users and groups dialog, select yourself from the Users list, then click the Select button at the bottom of the screen.
- Click on Assign.
Step 6: Test your SSO Connection
- Navigate to your Symbol Security sign-in page
- login with valid email address/username
- Test your access is working
- Logout from Symbol or open a new Incognito Window on the browser.
- Navigate to the Symbol Security Login Page.
- Enter your registered user email that is both a Symbol user, and registered on the Azure Portal.
- If everything was correct, you should be able to login successfully utilizing your SSO service.